
Written by: COL Kelly McDermott
Here is my build out for the “Guardian of Forever”. It came out to 4′ wide by about 3′ tall. For the base, I used a 21″ x 12″ x 1″ piece of pine.
I centered the bottom of the “Guardian of Forever” on the pine base.
Materials Used
- 12″ x 24″ pine board, for the base
- Two 1″ x 4′ x 8′ pieces of foam board insulation, for the Guardian
- 1″ x 2″ x 5″ pieces of wood for support: approximately 14 (count may vary)
- Duct tape
- Newspaper
- Wood glue or flour for papier-mâché mix
- Spackle to give texture
- Paint: Sand color base/primer
- Paint: Airbrush for details
Step 1: Draw
I drew what I wanted the “Guardian of Forever” to look like on a regular 8″ x 12″ piece of paper trying to imagine size and dimension. I then took my 4′ x 8′ piece of foam/installation and drew the “Guardian of Forever” on it.

Step 2: Cut Out
I then stacked the two pieces of installation/foam on top of each other and used tape to keep them together while I used a razor blade to cut them out. This kept both the same shape and size.
Step 3: Mount to Base
I created a 12″ x 24″ base using 1″ thick pine. I cut several pieces of 1″ x 2″ support wood into 5″ lengths, and two more to 10″ for the base. These became the spacers to hold the two installation/foam pieces apart. I mounted the two 10″ supports to the base so that the Guardian would have something to connect to on the base. I then glued each of the supports to the inside of the installation/foam and created the guardian by gluing the 5″ supports to keep shape. I then secured it to the base using glue and duct tape.

Step 4: Fill In (Optional)
I closed all the gaps with tape. This could be done with any type of tape; I used duct tape as I wanted it to be stronger to take to conventions.

Step 5: Papier-Mâché to Cover
- Next was to cover the entire Guardian in papier-mâché. You can use many mixtures of liquid for this—from water and starch to commercial papier-mâché glue to many combinations in between. I ended up using a mix of water and wood glue (any glue could work).
- I used a premium wood glue so that when it dries it will be stronger and gives a little more support than standard Elmer’s glue, and usually only needs one layer in most spots.
- I used old newspaper I had for this, but you can also use brown paper if you can’t find newspapers anymore. The ratio of water to glue mix is subjective, depending on how thick or watery you want to start with.

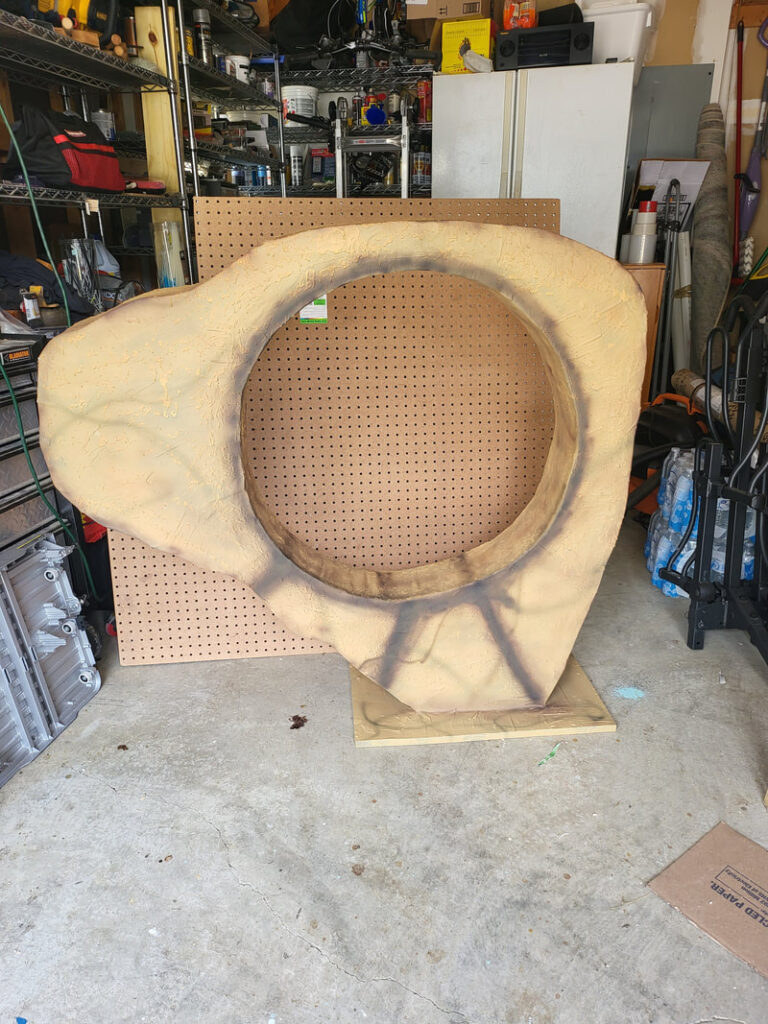
Step 6: Texture
I added some spackle all over to give some texture. It is a little hard to see but if you zoom in you will see it. For painting I did one coat of primer, and then a base coat using a sandstone color.
Step 7: Final Painting
For the final painting I used an Airbrush to add other colors, lines, and textures. This is my first Airbrushing so it did not turn out perfect but will get better as I go on. I used a lot of different colors as you can see to try and add some depth and design.
